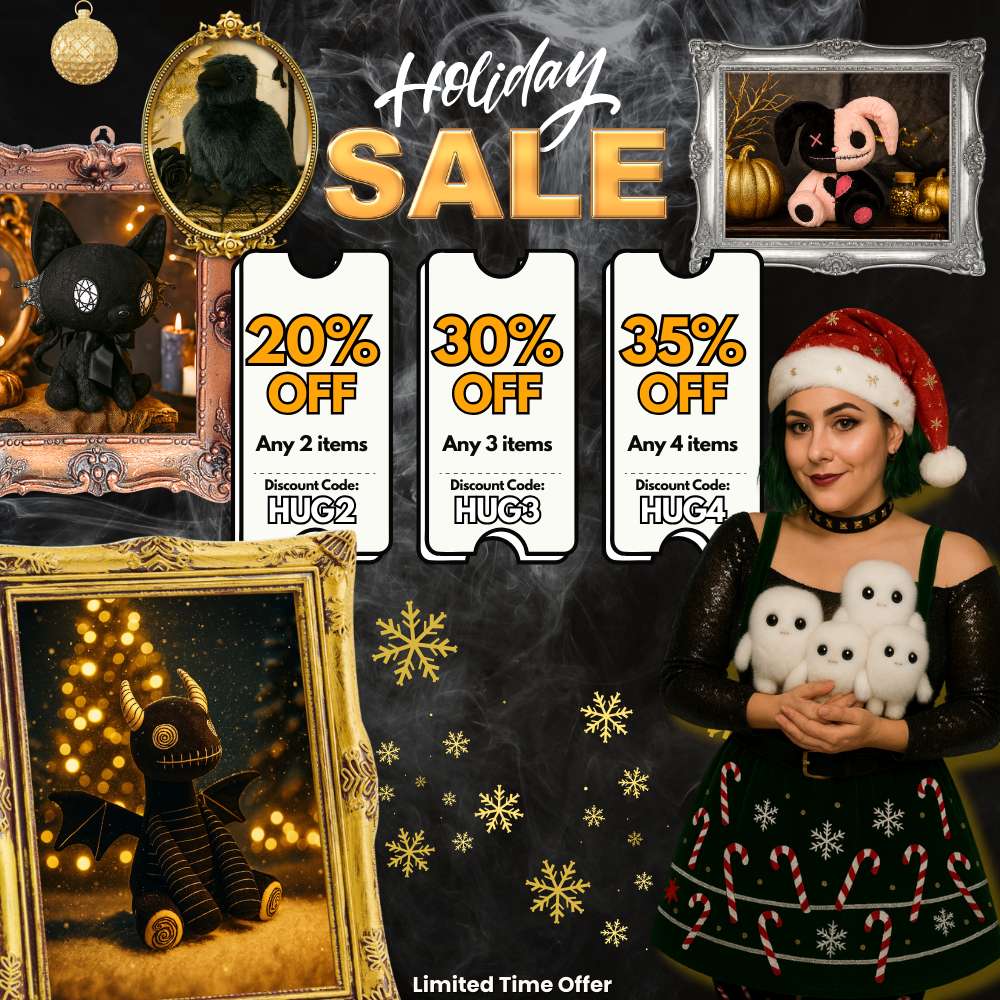

How to Make Plushies: Step-by-Step Tutorial 2025

Have you ever walked past a toy store or a claw machine and been completely captivated by that one impossibly cute plush toy? 🧸 Its stitched smile, its soft, huggable body… it’s like it’s calling out to you. But what if I told you that instead of trying your luck with the claw, you could bring a unique friend just like that to life with your own two hands?
That's the magic of making your own plushies—a delightful journey where every stitch is filled with affection, turning simple fabric and stuffing into a treasured companion. 🥰 In this comprehensive guide, we're going to unravel all the secrets. It doesn't matter if you're a seasoned crafter or a curious beginner who's never even threaded a needle.
So, find a cozy corner of your room, maybe with a warm drink by your side. Let's get your favorite fabric ready and dive into the enchanting world of plushie-making together! Let's get started! 💖
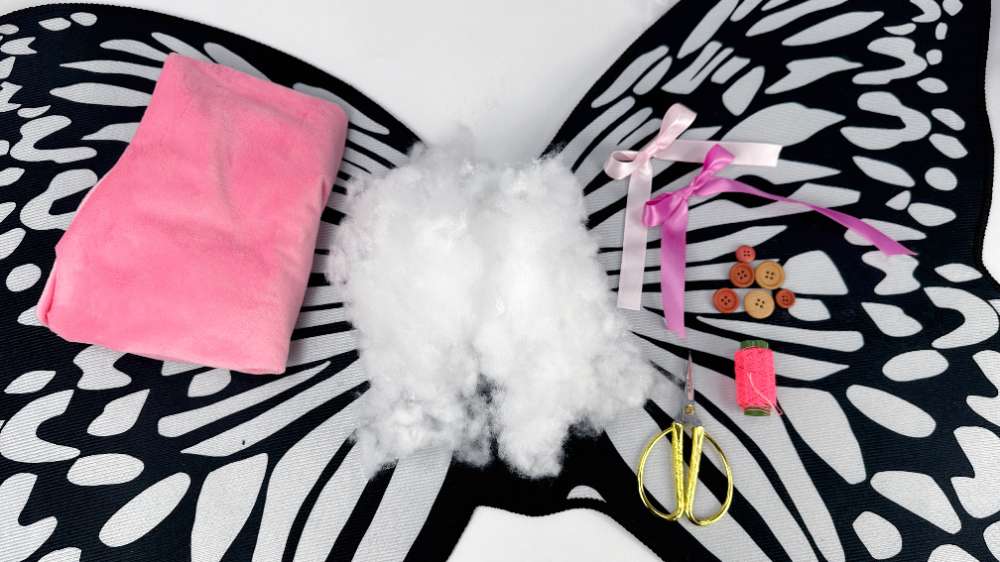
Get Hopping! What You'll Need to Make a Fuzzy Bunny Friend 🐰
- Prepare the Paper Pattern
Haven't crafted in a while, or feel like preparing all the tools is a huge hassle? Don't you worry one bit! Because I've got the perfect secret weapon for you—my "White Rabbit Plushie Pattern"! 🐰✨All the necessary parts are perfectly arranged on a single A4 sheet for you. All you have to do is print it out, and you're ready to start. How easy is that? 🧵💗

So, get your materials ready, and let's bring this one-of-a-kind cutie to life together, step by step. Just follow me, and you'll have this little cutie in no time!" ✨

- Prepare fabric
Cotton: Pure Cotton has a nice touch and durability in most cases. This is why it is mainly used to make clothes. It is a great choice for beginners who don't know how to choose fabrics.


Felt: Felt has good adhesive properties and does not come loose easily. You can use glue on it if you are not an expert with needles and threads.


- Prepare stuffing
Cotton: Generally speaking, cotton filler products are toys for infants. Cotton is a pure natural, environmentally friendly, and safe material that can be mixed with other harder filler materials.


Snow foam particles: As a commonly used filling material, snow foam particles are also used on specific products. It is mainly used in elastic fabric dolls and beanbag chairs. When using it as a filler, the fabric should have more elastic so as to make the most of it since it can be compressed and deformed. However, this kind of filling requires a specific machine. For homemade products, using a funnel is also a method.

- Prepare Tools

How to make a plush toy by yourself in 5 steps
How to make a plush toy by yourself in 5 steps
Creating stuffed animals is a much simpler task than you think. All you need is some inspiration and dedicated time, and you'll be able to make your stuffed animal. Follow these five simple steps below to get started!
Step 1:Cut the Fabric According to the Pattern
Alright, it's time for the exciting cutting part! First, pin your pattern to the back of the fabric, then use chalk to trace around it, making sure to leave about 1 cm for your "magic seam allowance"! As you trace, pay close attention to the fabric's grain and the direction of the fur, and for symmetrical parts, don't forget to flip the pattern over to draw the other half. Once everything is traced, go ahead and cut bravely along your lines! And here’s a little secret tip: label each piece with its name (like "ear") so you won't get mixed up later.
Here’s the end of the bunny plushie tutorial! 🐰Get your materials ready and follow the steps—let’s make an adorable bunny together!
 First, cut out the pattern! Carefully follow the outermost lines and cut all the way around! Hold your scissors steady—don’t cut too much! Let’s cut out the adorable bunny’s body together! 💕
 Next up! Place the cut-out pattern on the fabric and trace the lines! 🖊️Carefully draw the bunny’s outline along the edges of the pattern. If the lines are messy, it’ll make cutting and sewing tricky later on! Let’s draw a cute little bunny on the fabric together! 🐰✂️💕


Alright, let's get ready to mark out all the essential parts of our bunny on the fabric, following the numbers on our paper pattern! 🐰 For instance, how many pieces does this adorable bunny need in total? 🤔 And how many ears will it have? Make sure to double-check those numbers super carefully, because that's how we'll craft a truly perfect bunny! ✨ Let's gather all our bunny's bits and pieces together! 💞
 When placing your fabric, if you pull it a little closer together, you can effectively utilize the material and avoid waste! ✂️ Saving fabric is both eco-friendly and money-saving, truly killing two birds with one stone! Let's all become thrifty bunny creators! 💖💰
 Yay! You've successfully cut out all the fabric pieces for your bunny's various parts! 🎉 Excellent work! Now you're ready for the next step! With hands both excited and trembling, let's start assembling all of our bunny's "body parts"! 🤩 Let's get this bunny show on the road! 🚀
Steps 2:Sew the fabric pieces together


All sewn up? Now for the magic moment—let's carefully turn everything right-side out! Be super gentle during this part; we don't want to pull any seams apart. Next up, the most therapeutic part: the stuffing! Grab your cotton and let's make our bunny plump, soft, and super cute! 💕 I can't wait to see our fluffy rabbit come to life and give it a hug

Steps 3:Fill in the stuffing
It's time for the most exciting task of all: stuffing your rabbit and bringing it to life! ✨ Add the stuffing bit by bit, making sure it's evenly distributed in every part.
For smaller areas like the head, arms, and legs, use tweezers or a chopstick to gently push the cotton deep into the corners. It’s like a little game of hide-and-seek with fluff!
Adjust the amount of stuffing to your liking. Pack it tightly for a firm, solid feel, or keep it light for a softer, squishier cuddle buddy. Both ways are adorable in their own right! 🥰
Here’s a pro tip: if you try to stuff in a large clump of cotton at once, it might get lumpy or create an uneven surface. The trick is to tear off small pieces of cotton and carefully push them in from the back. Pay extra special attention to the face! This is a crucial area that defines your rabbit's expression, so be sure to stuff it evenly, keeping the balance between the left and right sides just perfect. 🐰💖


Steps 4:Assemble the pieces and close the seam
First, temporarily pin the face, body, hands, and feet in place, checking for balance as you go, then stitch them to the main body. ✨ At this stage, repeatedly check from all angles to ensure symmetry and firmly secure them in the cutest possible position! Choose a strong thread and stitch them securely using a "whip stitch" or "overcast stitch."
Next, sew the ears onto the head wherever you like them. You can have them droop, stand straight up, or even tilt them slightly... this is your chance to show off your unique personality! 🐰 Adjust the angle to your liking.
Finally, carefully sew the opening shut with a ladder stitch or blind stitch after stuffing. The key to a beautiful seam is to stitch along the fabric's grain so that no threads are visible from the outside. And just like that, your bunny's body is complete! 🎉

Steps 5:Add facial features and finish!
For the eyes (eyelets): First, decide on the placement, use an awl to make a small hole, insert the eyelet shaft, then securely fasten it from the back with a washer. For buttons, sew them on with thread. For embroidery, sketch a rough outline with chalk, then carefully stitch with embroidery floss.
For the nose and mouth: These are typically embroidered with floss. Feel free to design them as you like, such as a smiling mouth or a simple V-shape. Pink or brown embroidery floss will look great on the bunny.
Decorations: Add some adorable decorations to your little bunny to make it even cuter! For example, you can add a charming ribbon, a sweet bow, or even embroider rosy cheeks with pink floss on its face for extra cuteness! 😍 For all you detail-oriented crafters, dress up your little bunny to make it the coolest! ✨ Everyone will exclaim, "So cute!"
The placement of the eyes, nose, and mouth truly changes the bunny's expression. Find the look that makes it the absolute cutest to you! If you create with all your heart, you're sure to end up with an adorable bunny. 😊

 🎉 Yay! Your very own little bunny is finally here! Give them a big hug! 🤗

“Handmade seems a bit difficult... but I really want a cute bunny!" 💖
Okay, reading this, some of you might be feeling a little anxious, thinking: "Wow! I'd really love to make this, but I'm not good at sewing, so I wonder if I can do it..." 😥 or "This might be difficult, and I don't have enough time to gather all those adorable materials..." 😩
Indeed, handmade items do take time and effort, but the joy and attachment you feel when you complete them are so immense, it's hard to put into words.
However, what if you genuinely want the comfort of the cutest, fuzziest bunny like a Plush This right away? ❤️🔥 In that case, there's no need to force yourself to make one by hand! Welcoming a finished bunny from Plush This is also a perfectly wonderful option! 😊 A plush toy crafted with professional skill and attention to detail will bring you ultimate healing and joy.
Such as...


FAQ
Is it hard to make a stuffed animal?
Not at all! If you start with a stuffed animal that has a basic structure or simple shape, it will be easier than you imagine. Sometimes you don't even need to use sewing skills, just use glue to get things done. However, turning flat pieces of fabric into three-dimensional stuffed animals requires extensive experience. Without proper experience, it can be a bit difficult to achieve the desired shape and create a high-quality stuffed animal.
How long it takes to make plush toys yourself
If you are a beginner in sewing or making plushies, it might take you quite a long time to finish it. But things will be different when your plush is simple and small or you already have a pre-made pattern. You will probably finish it within an hour. In the end, it all depends on your sewing skills, size and the complexity of your design.
How much does it cost to make your own plush?
The price depends on your design, style, quantity, material, complexity, etc. Basically, it doesn't cost any money to design it by yourself. But if you get an independent designer to draw rendering for you, it may cost more than you think. Creating stuffed animals requires materials such as stitching, fabric, glue, and filling, which can cost a certain amount of money and time to acquire. However, the joy of DIY is priceless and makes the investment worthwhile.
Summary